Archive of posts with category 'desserts'

Summer fruits cake!

Summer is finally here and what is the best than a cake to celebrate it with friends? This recipe is easy to make – at this link you will find my sponge recipe but if you don’t feel like baking you can always buy some already made sponge. The important thing in this case is that you are using fresh fruits to top it up! Happy Summer everyone!

What you need:

  • 250 g mascarpone cheese
  • 100 g icing sugar
  • a jar of jam (I used handmade strawberry jam but you can use any flavour)
  • juice of half lemon diluited in 150 ml water
  • 50 g almond flakes
  • fresh fruit for the topping (I used organic redcurrants from my parents garden)
  • food colouring (optional)

How to make it:

Slice the sponge cake in three layers and soak the cake base with some lemony water (the sponge can be quite dry so the water helps with this. Make sure the sponge is moist enough but not too much that it breaks). Beat the mascarpone with the icing sugar and if you fancy you can add some food colouring at this stage.

Spread a thin layer of jam on the cake and then add some mascarpone filling. Place the second layer on top of the iced one and repeat the steps above (water, jam, mascarpone) – in this second layer I have also added some almonds to add some extra crunch!

Place the last layer of sponge and decorate the top with the fresh fruit and the remaining almonds. You can also add fresh cream or icing sugar if you want.

Summer Fruits Cake Top

Summer Fruits Cake Side

Victoria sponge with fresh cream and fresh berries

Hi all,

it has been way to long since my last recipe, I know! I hope you will all enjoy this amazing cake that I baked some time ago: the base is a traditional sponge (recipe HERE), filled with lots of fresh cream and fresh fruit. In this case I used different types of berries (and added some edible flowers and a butterfly)

It’s a perfect cake for any occasion (from birthdays to Christmas).

Let me know your comments

The end result

Chocolate cake – Christmas version

With a bit of delay, here is the first Christmas recipe for 2017. This Christmas tree chocolate cake is very easy to bake and it is made to impress.

What you need:

  • 100 g caster sugar
  • 50 g self raising flour
  • 4 eggs
  • 75 g cocoa powder
  • 15 g corn flour
  • almond essence
  • salt

How to make it:

In a bowl whisk together the egg yolks and the sugar until you have a creamy mixture. Sift in the flour, the corn flour, the cocoa powder and incorporate well until smooth. Add the almond essence and stir once more.

Beat the egg whites with the salt until peaks form and add them to the batter with smooth movements, mixing from the center of the bowl.

Add the batter to a Christmas tree shaped mold and bake in the oven at 190C for 35 mins.

When the cake is completely cooled down use your fantasy to decorate it. In this cake I just used sugar ribbons and snowflakes and icing sugar.

Chocolate cake

Blueberries and almond cake

This is the right season for berries and this is a perfect recipe to use them. It is a delicious and moist cake that combines the nice flavour of the berries with the crunchy taste of the almonds. The recipe below is for a square tin of 15 cms – baking a regular sized cake would be too much for the 2 of us but if you need to make a bigger cake (ie 20 cm square or round tin) you will need to double the ingredients below.

What you need:

  • 75g unsalted butter, softned
  • 75 g caster sugar
  • 125 g self raising flour
  • 7 g baking powder (1/2 tsp)
  • 80 g blanched almonds, halved
  • 200 g blueberries
  • 1 large egg
  • 75 ml milk

How to make it: Preheat the oven at 180°C and grease and line your cake tin. Gently wash the blueberries and let them dry before using them.

Cream the sugar with the butter until light and fluffy with an electric mixer. Add the egg and work well until all ingredients are combined.

Add the flour and the baking powder (sifted), the almonds and the milk and whisk well. Once you have a nice mixture you need to incorporate the mjority of the blueberries. Spoon the mixture in the tin and add the remaining bluberries at the top.

Bake your cake in the oven for 35 mins approx – check your cake while baking as if it begins to brown you would need to cover it with some baking paper or foil so it will cook evenly.

Test with a toothpick if your cake is ready and if it comes out clean you can remove the cake from the oven and let it cool down.

Enjoy your cake when completely cooled down with some fresh blueberries or if you want indulge with some fresh cream.

Cranberries and pistacchio oat cookies

These cookies are Amazing: I baked them for my husband who is back to school again. He needed a little help with sugars so I decided to bake these beautiful treats.

What you need:

  • 100g pistacchio nuts
  • 100g unsalted butter,softened
  • 100g dried cranberries
  • 200g brown sugar
  • 1 egg
  • 1tsp vanilla
  • 1tbsp honey
  • 125g self raising flour, sifted
  • 125g oats
  • pinch of salt

How to make it:

Pre-heat the oven at 190° and line 2 baking trays with baking paper.

Mix together the butter and the sugar unitl smooth (better to use an electric whisk). Add the egg, the vanilla extract, the honey and whisk again. Add the flour, the oats, the salt, the pistacchio nuts and the cranberries. Mix well until combined.

You need now to divide the dough in small little pieces (like a walnut), place them on a baking sheet leaving enough space for the cookies to cook. Flatten the cookies slightly and bake them for 10 minutes. Leave the cookies to cool down.

Cookies

Tips:

  • if the dough is too stiff you can add little water or milk;
  • cookies need to be flatten before baking them so they cook evenly;
  • if the cookies look soft after 10 mins remove them from the oven: they will get the cookie consistency once they are completely cooled down. I learned this after several burnt batches.

Butterflies all the way!

Here you go with a nice idea how to serve your sponge cake: use a biscuit cutter to shape it as desired and dust it with some edible glitter or icing sugar! You can find the recipe here.

Butterflies

Naked fancies

I received an amazing recipes book about naked cakes (“naked cakes” by Hannah Miles) so I decided to try one called Naked fancies: I hope you enjoy this super natural recipe. I believe if you have a bit of practice this can be used for Weddings, b-days and any other occasion you have to celebrate.

What you need:

  • 115 g butter, softened
  • 115 g sugar
  • 2 eggs
  • 115 g self-raising flour
  • 1tsp baking powder
  • 1tbsp buttermilk or sour cream
  • 40ml rose or violet liqueur

For the buttercream:

  • 300 g icing sugar
  • 30 g softened butter
  • 1 tbsp milk

For the glaze:

  • 280 g icing sugar
  • 50 ml rose or violet liqueur

How to make it:

Mix the butter and the sugar with an electric whisk. Add the eggs to the mixture and continue to whisk. Sift in the flour and the baking powder, add the sour cream and work all the ingredients until incorporated.

Spoon the cake batter into a cake pan and bake for 20 minutes in a pre-heated oven (180°C). Once the caked is ready let it cool down and start preparing the icing.

Mix the icing sugar and the butter adding little milk if the mixture is too stiff.

Cut the cake in half horizzontaly, drizzle in some liqueur (the original recipe says violet liqueur: I used rose liqueur) and spread a layer of buttercream. Top the cake with the second half of the cake and let refrigerate for 2 hours.

Cut the cake in 16 mini cakes.

Make the glaze by heating the icing sugar in a saucepan with some liqueur and about 100 ml water until you obtain a translucent liquid. Spoon the icing over the cakes and decorate with some edible flower or anything your fantasy suggests.

Naked fancies

Chocolate cookies

An evergreen: chocolate chips cookies!

What you need:

  • 420 g flour
  • 250g butter
  • 200 sugar
  • 200 cane sugar
  • 2 eggs
  • vanilla extract
  • chocolate chips (as much as desired)
  • 1 tsp of salt
  • 1 tsp bicarbonate soda

How to make it:

Pre-heat the oven to 190°C. Soften the butter to room temperature, when softened beat it with the sugar (both sugars) until you get a light creamy result. Add the eggs, one at the time and then the vanilla extract. Add the sifted flour until all the ingredients are well combined. Add the chocolate chips and stir them quickly. You should have now a quite thick dough.

Line a baking tray and distribute the dough by using a spoon: make sure to leave a bit of space between the cookies as they will grow while cooking. Bake for 10 minutes, until golden brown. Make sure you do not over bake them (as I did with the first batch) as the cookies will burn!! Remove the tray from the oven and let the cookies rest for few minutes. Enjoy your amazing cookies!

Chocolate cookies

Christmas chocolate mousse

Ho ho ho, Christmas time is coming so it is time to start posting some recipes for the festive season. The first one is going to be a Dark Chocolate Mousse: DELICIOUS! Not only this recipe tastes good but you don’t need eggs or flour to make it so perfect in case of allergies. Hope you enjoy it!

What you need:

  • 250 g dark chocolate
  • 300 ml double fresh cream
  • digestive biscuits (optional)

How to make it: Before starting with the instructions I want to give you some recommandations:

  1. use extra dark chocolate (min 75% cocoa): I know not everybody loves dark chocolate however it is important for the good result of the recipe. Using a milk chocolate or any other type will not deliver the same result. The fresh cream is sweet enough on its own;
  2. make sure the bowl where you will whip the cream is clean and non greasy otherwise you will not get a good result. The first thing to do in this case is whipping the fresh cream: pour the fresh cream in a mixer and mix for about 2/3 minutes or until soft peak stage. Keep your cream in the fridge.

Melt the chocolate through the bain marie technique (it basically means melt the chocolate in a bowl over a pan of simmering water) so you don’t burn it out. Keep mixing your chocoalte until it is completely melted. Remove the chocolate from the hob and let it cool down for 5 minutes, stirring constantly. Gently add the melted chocolate to the cream and with movements from the centre to the outside of the bowl, keep mixing until you incorporate all the chocolate.

You can now serve in glasses or small cups and guarnish with biscuits and with the remained cream. This is the result:

Chocolate mousse

Few more tips:

  • this mousse should be kept at room temparature. If you wish to prepare it the day before remember to take it out from the fridge at least 30 mins before eating it. If not, it will be still super tasty but a bit harder to eat;
  • this mousse can be also used to cover any other dessert: cupcakes, cakes, croissants…feel free to use it as desired.

The perfect sponge

I have just entered a competition at work to celebrate the International Baking Day and I have to bake a cake which is representative of my country, Italy. Now I will not yet provide any information about the actual cake but I am going to post the recipe to make the perfect sponge.

The sponge is a great base for many recipes and you need to know how to do it! There are different ways of making sponge but here I will focus on the one which I consider the quickest (not the easiest). Before starting I would like to point out one important aspect about the sponge: there are so many recipes in the web which use butter, baking powder and other ingredients. Now the typical sponge recipe does not include any fat or any baking powder: the air incorporated while beating the eggs will work as baking powder. You can trust me that if you follow the steps below your cake will be perfect!

What you need:

  • 150g sugar
  • 150g flour (or 75g flour and 75g potato starch)
  • pinch of salt
  • 5 eggs

How to make it:

Pre-heat the oven at 180ºC and line a baking tray: a 24 cm baking tray is ok.

Using an electric whisk beat the eggs & sugar together till you obtain a nice and smooth mixture. Incorporate the salt. Be careful not to over beat the eggs otherwise your sponge will be crumbly and this is not what you want.

Sift the flour in the mixture. Little by little and starting from the centre of the bowl incorporate all the flour to the mixture. You need to incorporate the flour with delicate movements so the air bubbles remain in the mixture. As pointed out earlier on there is no baking powder in your sponge; the secret for a well risen sponge is to make sure the mixture incorporates enough air when beating the eggs.

Transfer the mixture to the baking tray and bake for 40 mins. Let the mixture cool down and then slice it in two layers. Before filling the cake remember to soak the internal part of the sponge with some liquid: it can be any type of spirit (I love with Amaretto or rum) or simply lemon juice or milk, depending on the topping. This type of cake is normally dryer than other cakes so you need to fix this aspect.

Buon appetito!

Yoghurt and cinnamon cake

Ingredients:

  • 200g flour
  • 150 g sugar
  • 300g natural yoghurt
  • 2 tbsp oil
  • 15 g baking powder
  • 1 tsp honey
  • 1 tsp cinnamon
  • 1 pinch of salt
  • 1 orange: juice and grind

How to make it: Grease a baking tin. Sift together the flour, the sugar, the baking powder and the cinnamon. In a bowl combine the yoghurt, the honey, the oil, the orange juice and orange grind. Gently add the solid ingredients to the liquid ones till everything is well combined. Pour the mixture into the prepared tin and bake in a preheated oven for 40 minutes at 180°C. Let the cake cool down and sift it with some icing sugar before serving.

Yoghurt and cinnamon cake

Easy strawberries cake

With a little delay today I post this easy recipe for a cake which is perfect for St. Valentine day. But I’d say this is perfect for any occasion.

What you need:

For the dough:

  • 150g flour
  • 110g unsalted butter
  • 75 g sugar
  • 1 egg
  • 1 pinch of salt
  • 1 tsp baking powder
  • grated lemon zest
  • 1 tbsp White wine

For the topping:

  • 200g fresh strawberries, washed and sliced
  • juice of 1 organic orange
  • 250 ml fresh cream
  • 50 g icing sugar
  • 50g strawberry jam

How to make it:

Pre-heat the oven at 180°C. Work together the sugar, the softened butter and the egg into a rough paste. Add the salt, the baking powder, the lemon zest and the wine. Gradually work in the flour with your fingertips to bind the ingredients into a smooth dough. Wrap the mixture in clingfilm and chill for 30 mins.

In the meanwhile add the orange juice to the strawberries and set them aside (if you like it you can add Cointreau instead of the orange juice). Roll out the pastry in a floured surface and line a 20 cm tart tin. Prick the pastry base with a fork, cover it with some baking paper and bake for 15 mins. Remove the baking paper and keep baking for additional 10 mins,

While the base is baking you might start preparing the filling;Whisk together the double cream with the icing sugar untile nice and fluffy. This will take you around 6/7 minutes with a kitchen robot at max speed. Be careful when doing this as the cream might turn out as butter.

Once the base has cooled down you can start decorating your cake. Spread the strawberry jam over the surface of the cake and place the strawberries and the cream as desired. Below it’s my cake. Hope you enjoy it.

Strawberries cake

Christmas treats

This is going to be my first recipe for Christmas time. Few words to describe it: easy, delicious and perfect. If you don’t have time but you are having a dinner on the same night this is just perfect. Result is 100% guaranteed. Hope you enjoy it.

What you need:

  • 250g mascarpone;
  • 2 cups of espresso;
  • 250 g amaretti;
  • 20 g cocoa powder;
  • 50 g desiccated coconut;

How to make it:

First thing to do is to dip into espresso coffee your amaretti biscuits. Make sure they don’t become too wet otherwise they will break.

Dispose the amaretti in a dish and set aside. You need now to make the cream: whisk together the mascarpone and the cocoa powder until you have a soft light brown cream.

Once you are done with it you can compose your dessert: take one biscuit, add some cream and stick it to another biscuit. Basically one biscuit should be an half dessert. When all your little treats are ready you need to roll them into the coconut. For best results keep them in the fridge until it’s time to serve them.

Basic recipe for cupcakes

Hi there! Today I will post the standard recipe to make cupcakes. You can use this one for every kind of cupcake you want as it is very easy.

What you need:

  • 125 g softened unsalted butter
  • 125 g sugar
  • 2 eggs
  • 125 g white flour
  • 1 tsp baking powder
  • 1 tsp vanilla extract
  • a pinch of salt

How to make it:

Pre – heat the oven to 190°C. Beat the softened butter and the sugar in a bowl until well combined. Gradually beat in the eggs and add the vanilla extract. Sift the flour, the baking powder and the pinch of salt in the mixture until combined to a fluffy mixture.

Dispose the mixture in your baking tray and bake the cupcakes for around 15 mins until they are golden brown. Test them with a toothpick; if it comes out clean and dry then your cupcakes are ready. Let them cool down before decorating them.

TIPS: Make sure that all the ingredients are at room temperature, butter included: you want it soft when you are beating it. Remember also to fill the cupcakes liners up to 2/3 only: you are not baking muffins!!

Choux pastry

Choux pastry is today’s recipe. This is a very good recipe, easy and quick to make and I assure you the results are great. It can be used for both savoury or sweet recipes.

What you need:

  • 75 g plain flour
  • 50 g unsalted butter
  • 2 large eggs
  • 150 ml of water
  • pinch of salt

How to make it:

In a bowl sift togheter the flour with the salt. Put the butter and the water in a saucepan and heat them until the butter has melted. Bring the mixture to the boil.

Once melted remove the pan from the heat and add the flour immediately. Mix with a wooden spoon until the mixture becomes a ball (it will take you not more than 2 minutes). The mixture is ready when the sides of the pan are clean.

Choux pastry mix 1

Wait 2 minutes for the mixture to cool down and then gradually add the eggs. Beat everything until the mixture is smooth; the choux pastry is ready when it gently falls form the spoon. What I suggest you is to use the mixture immediately. If you need to use it later you’d better cover it very well and keep it chilled until you need it.

Tip: Be careful not to bring to the boil the water before the butter has melted. This is a very important detail if you want to have a good result.

Choux pastry mix 2

Frittelle

Today is pancake‘s Tuesday but it is also the last day of the Carnival. One of the traditional desserts for this time of the year are Frittelle. They are sweet deep fried balls made with raisins or apples. In some parts of Italy (in Venice for instance) they are filled with cream or Nutella. Only one word to describe them… DELICIOUS (avoid them if you are on a diet!).

BEFORE YOU START you need to keep in mind few things about frittelle: first of all you will fry a lot so your kitchen will be VERY smelly after! Also don’t worry if your frittelle will look like little monsters, this is normal! You will need a lot of practice before having the “perfect frittella”

What you need:

  • 120 g plain flour
  • 80 g self-raising flour
  • 2 eggs
  • 50 g butter
  • 60 g sugar
  • 70 ml milk
  • lemon essence or lemon zest
  • 1oo grams sultans or 2 chopped apples
  • 1 pinch of salt
  • sunflower oil for frying

How to make it:

Warm up the oil in a big pan. Sift together the flour, the baking powder and the sugar. Add to the “dry ingredients” the melted butter, the eggs (one at time), the milk, the lemon zest and the pinch of salt. Combine well all the ingredients until you have a smooth and fluid dough. The last step is to add the sultans or the apple. Now comes the hardest part: with 2 teaspoons gather a small amount of dough and drop it into the boiling oil, like if you want to create small balls. IMPORTANT: do not fry too many spoons of dough at the same time or it will be a mess. Depending on the size of the pot but I suggest you not to fry more than 5 frittelle at the time. It will take you more time but you won’t waste anything.

Make sure you turn your frittelle while they are frying so they will get the same colour on all sides and you won’t burn them. Once they are golden brown drain them well and place them on a kitchen paper to absorb the extra oil.

Once all the frittelle are ready, let them cool down and only when they are completely cold sift them with icing sugar.

Frittelle

Strawberries tiramisu

t’s spring time (well, in Dublin not really but let’s consider the calendar, not the weather)! This is the perfect recipe to prepare for your Sunday’s afternoons or maybe just because you need to make a dessert for your friends! So here we go with one of the best Italian dessert in a very fresh version: TIRAMISU WITH STRAWBERRIES.

What you need:

  • 3 eggs
  • 250 grams mascarpone cheese
  • 40 grams sugar
  • Savoiardi biscuits (2 packages)
  • 400 grams of fresh, red strawberries
  • 2 oranges
  • 1 lemon

How to make it:

Let’s start by cleaning the strawberries, remember to keep some of them for the decoration. Wash tand cut them in small pieces, then put them in an bowl with the orange and lemon juice and leave them in the fridge for 15 minutes.

The ingredients

Meanwhile you can start preparing the cream. Separate the eggs and beat the yolks togheter with the sugar. Gently add the mascarpone and stir with a wooden spoon. Beat your egg whites until stiff peaks form in your bowl. Add them to the cream.

In a different bowl squize the other orange, add 2 tbs of water and the liquid of the strawberries.

Let’s start now to create our tiramisu: put some cream on the base of your cake tray, take the savoiardi biscuits and dip then into the strawberry juice. They have to be moist enough but be careful not to break them..we all know how are biscuits with liquids ;0)!

Gently dispose them in the tray and when it is all covered, add some of the cream on the top. You can now add the strawbeerries. If you prefer you can blend them with a food processor so you will have a nice sauce..Personally I prefer to eat the strawberries. You can now add another “floor” of biscuits and then again the cream. When all your cream is finished add the strawberries for the decoration on the top and put the tiramisu in the fridge.

Tiramisu

TIP: If you want to have a better result you can prepare your dessert the night before serving it!

Pancakes!!!!!

I couldn’t resist, I had to write about pancakes! Last Tuesday was Pancake’s Tuesday and I decided to make some for a good reason!We were collecting some money by selling our delicious pancakes in the company I work for. It was my first time and I have to say they were really good!

Well here we go then, enjoy :o)

What you need:

  • 100g plain flour
  • 250ml of milk
  • 1 egg
  • a pinch of salt
  • some butter or margarine for frying

How to make it:

Let’s start by sifting togheter the flour with the salt in a bowl;then make a hall in the middle. Add the egg in the centre. Gradually add the milk and stir with a wooden spoon until all the flour has been incorporated. With a mixer beat again the ingredients until you don’t have a smooth batter. Add the rest of the milk and beat for another 1 minute. You should have a nice and smooth cream like the one on the pic below!

Let’s now fry the pancakes!Get a non sticky pan and heat it well, then quickly coat the pan with the margarine or the butter. Put part of the mixture in the pan and fry it until golden brown on the side. Once is well cooked, you need to turn your pancake – actually it’s not that easy so if you don’t manage to flip the pancake (as I do, LOL) just turn it with a spoon or a palette.

Keep doing this operation until all the pancakes are ready. You need to serve them really warm before adding your favourite topping. Some tips? Nutella, Jam, Golden Syrup, … mmmmmmmhhhhhhhhhhhh!!! :0)

Pancakes

Carrot and orange cupcakes

Hi all, today is cupcake’s day! YAY! So here we go with these delicious mini cakes!

What you need for the cakes:

  • 115 g softenend butter
  • 115 g brown sugar
  • the zest of 1 orange
  • 2 eggs
  • 175g of carrots
  • 20 g of chopped walnuts
  • 125 g flour
  • 1 tbsp baking powder

What you need for the frosting:

  • 250 g mascarpone cheese
  • 5 tbsp icing sugar
  • zest of an orange

We will start by preheating the oven to 180°C. Place the softeoned butter in a bowl, with the sugar and the zest and beat unitl you don’t have a fluffy mixture – gradually add the eggs and keep beating.

Grate the carrots, squeeze the water in excess and add them to the mixture along with the walnuts and orange juice. Stir well. Sift the flour and the baking powder and set aside. Line your muffin case with 12 paper cases and spoon the mixture on them. Bake in the oven for 20 minutes or until golden.

While your cupcakes are baking prepare the topping. Place the mascarpone in a bowl with the icing sugar and the orange zest. Beat togheter until they are completly mixed.

Spread your frosting on the cupcakes using a spatula only when they are completely cold! Et voilà…that’s the result!

Cupcakes

Crostata alla frutta

Good evening!

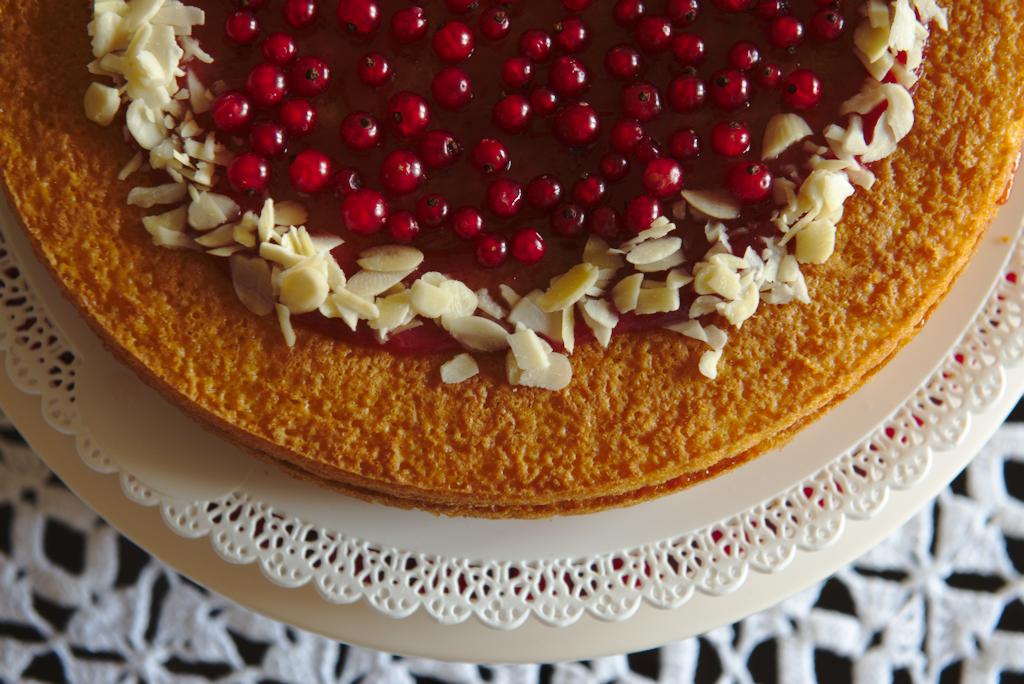
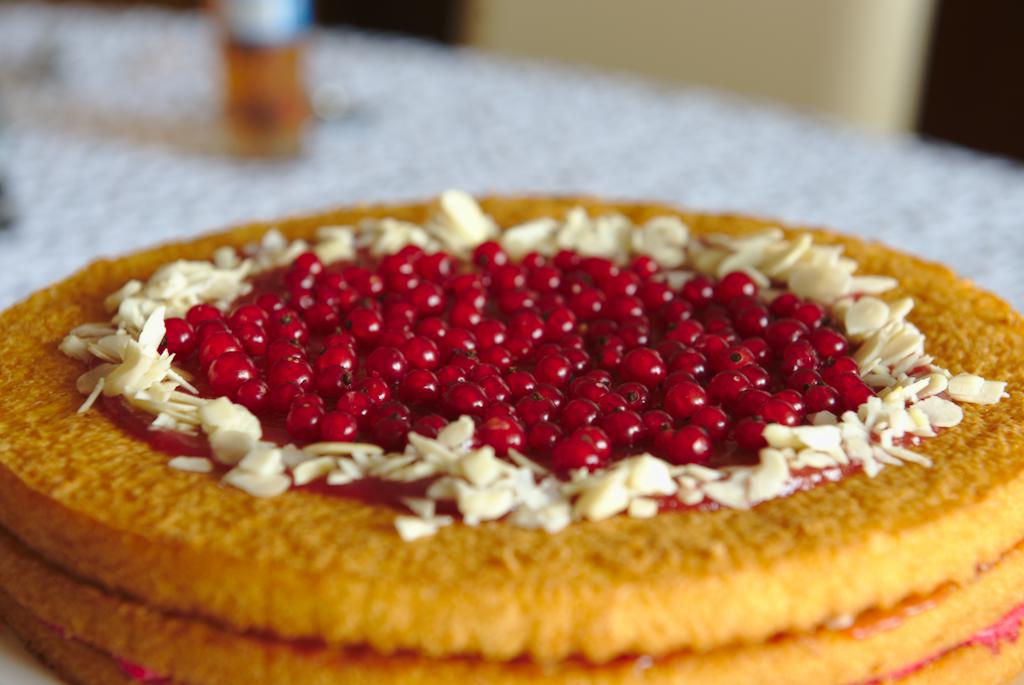
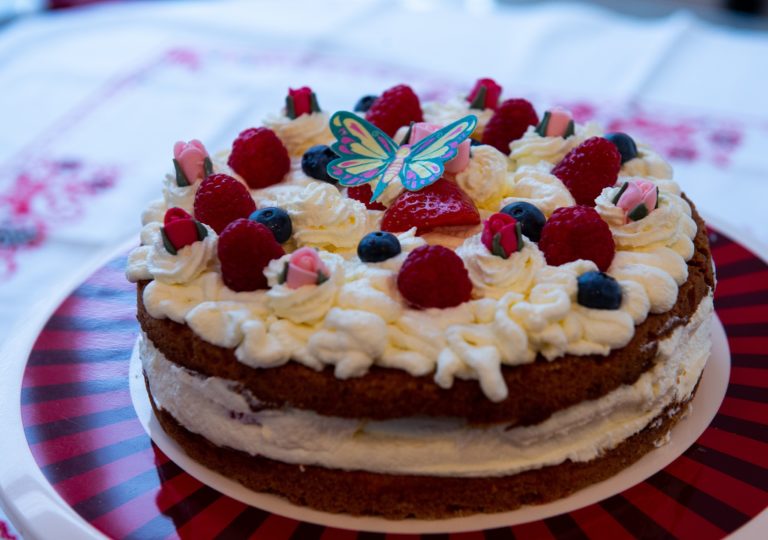
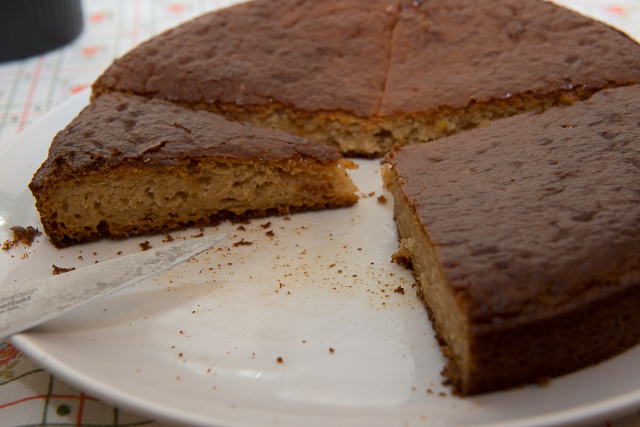
I know it’s been a while since I have posted my last recipe but I’ve been a bit busy during the last few weeks. Anyway, here we are with the next one: the crostata. Crostata is a typical italian tart, with a nice crust and a soft heart. It’s relly quick to make and it’s perfect for different occasions such as pic nics, b-days or just for a dinner. For our recipe, I topped the cake with a home made crema pasticcera and fresh fruit. Alternatively you can use marmelade or jam.

What you need

for the pastry:

  • 120 g flour 00
  • 4 egg yolks
  • a pinch of sea salt
  • 100 g sugar
  • 100 g unsalted butter – room temperature

for the cream (crema pasticcera):

  • 1/2 cup (100 gr) sugar
  • 4 egg yolks
  • 2 tablespoon of flour
  • 2 cups (500 cc) milk
  • lemon rind or lemon flavour

How to make it:

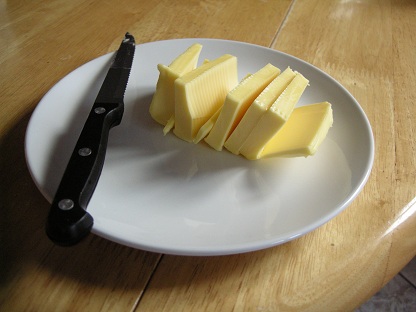
TIP – 10 minutes before starting you need to prepare the butter: place it on a plate and cut it into thin slices. Keep it at room temperature.

Butter slices

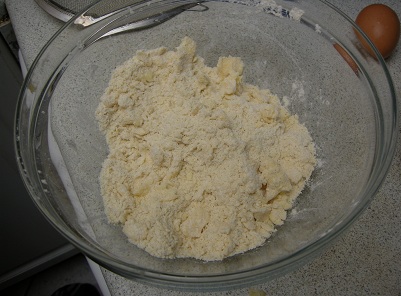
Sift the flour in a bowl, add the softened butter and start working the ingredients with your fingers. You should obatin a dry crumbled mixture.

Crumbled mix

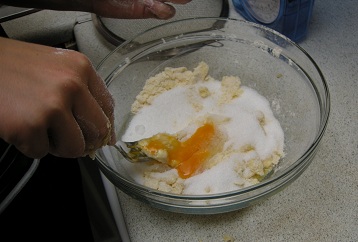
Add the eggs, the sugar and the pinch of salt and mix the ingredients togheter.

Add the egg

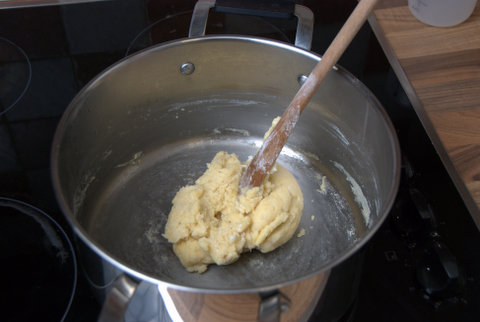
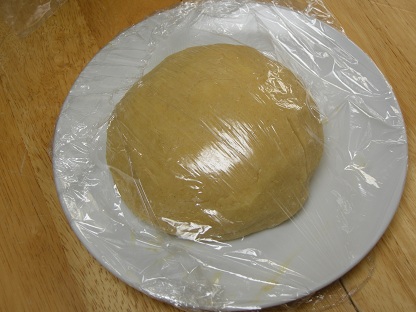
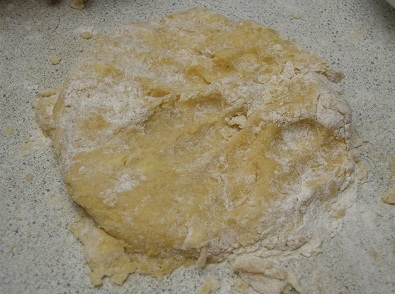
Transfer the mixture on a work surface and work it quickly with your hands until you get a nice and smooth dough.

If your mixture sticks on the table (or on your hands) use some flour to give it more conistency. The result has to be a smooth “ball”(see picture below). Once you have your pastry ready place it on a plate and let it aside for 15 minutes. A good tip is to cover it with a cloth or some film.

Dough resting

In the meanwhile, the cream can be prepared according to the following instructions:

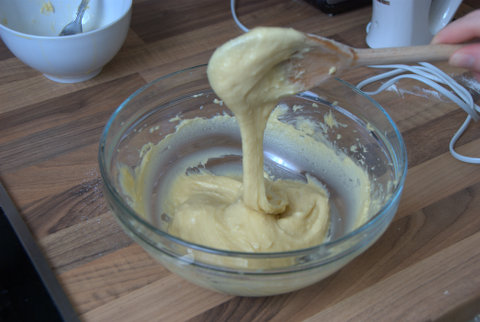
Place the egg yolks in a sauce pan and add the sugar.

Cream ingredients

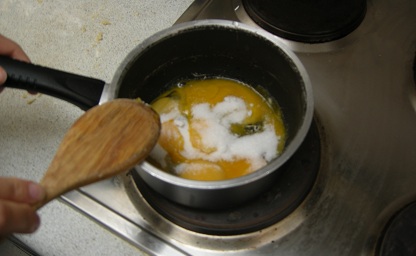
Beat them together with a wooden spoon and gently sift in the flour. Whisk thoroughly until fully combined. Transfer the sauce pan on medium heat and add the slice of lemon rind or 1tsp lemon flavour. Gently add the milk at room temperature, little by little, and bring the ingredients to a boil.

Mixing the cream

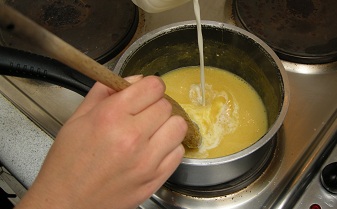
Keep stirring constantly as we don’t want a “smoked flavour”. Remove from the stove and set aside.

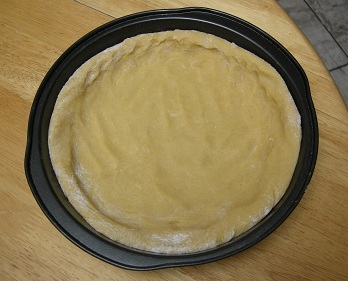
Pre heat your oven at 180°. Work your pasta frolla, using a rolling pin: you need to create a disk who fits the baking tin. The thickness of your cake has to be at least 1.5 cm; if your baking tin is too large, you need a smaller one. Crostata has to be eaten with your hands so it has to be “hard enough”.

Dough

Place the pastry into your baking tin; you don’t need to butter the tin. While cooking the butter into the pastry will prevent the cake from sticking. When placing the mixture remember to create a little border so you will be able to eat it with your hands.

In the baking tin

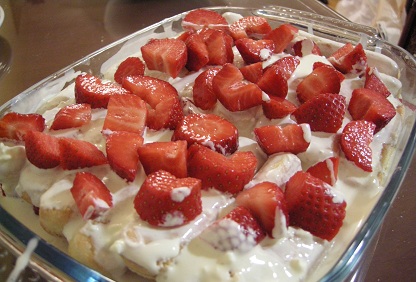
Place the baking tin into the oven and bake it for 30 minutes or unitl golden ( you can use the toothpick test if you are not sure). While the cake is cooling down, add the custard (Crema pasticcera) on the top!Guarnish your cake with fresh fruit and ..enjoy!

The cake

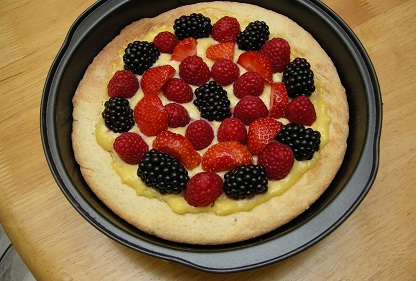
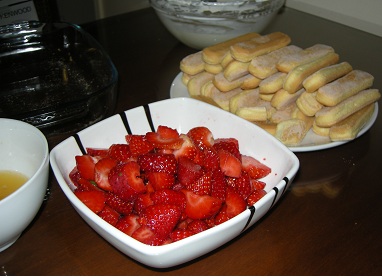
Ps: we love tasty food, don’t we? So try to choose only seasonal fruit – you will get the best natural flavour ever. I’ve heard October is perfect for cox apples… ;-)