Archive of posts with category 'main dishes'

Leek and pumpking soup

Happy 2017 everyone. Now that the winter has started, nothing can beat a warm soup. Pumpkin is probably the most popular winter veggie and it is associated with Halloween and it is thought to keep sinister spirits and ghosts away. Leek belong to the “Allium ampeloprasum” family and contains the flavonoid kaempferol, which helps us in protecting our heart from cardiovascular diseases. Last but not least this recipe is dairy and fat free therefore if you are on a diet it’s just the perfect meal.

I hope you will enjoy it.

What you need:

  • 1 leek
  • 500 g pumpkin, peeled and roughly cut
  • 0.5 l vegetable stock
  • 1 garlic clove
  • parsley to garnish
  • salt and pepper

How to make it:

Bring stock to the boil, in the meanwhile halve the leek length ways and wash it to remove any dirt. Wash the pumpkin and add it to the stock together with the leek and the garlic. Cook the soup for 15 mins or until the pumpkin has softened. Add salt and pepper and let the soup cool down for few minutes. With a blender or food processor cream the soup.

Serve it piping hot and add some parsley to your dish before eating it.

Leek and pumpking soup

Blueberries and red wine risotto

As promised, a recipe for your St. Valentine’s day. I hope you like it: lots of love everyone.

What you need:

  • 120 g risotto (Vialone style)
  • 2 glasses of red wine (I used Refosco dal Peduncolo rosso)
  • 100 g blueberries
  • 1 medium red onion
  • 1 dl vegetable stock
  • 2 tbsp extra virgin olive oil
  • 100 g fresh cream
  • parsley

How to make it:

In a medium pan over medium heat, brown the chopped red onion in the oil until tender. Add the rice and stir for 2 minutes, then add the wine and when all absorbed decrease the heating. Start adding the broth and the blueberries and keep stirring so the rice does not stick.

Keep adding the broth, a cup at a time, until the rice is tender: it should have an “al dente” look . At the very last minute add the fresh cream and the parseley so the risotto gets quite smooth and all the ingredients are melted together. Serve hot and if you like you can add some fresh parseley leaves.

Enjoy!

Polenta and mushrooms

Another recipe for your Christmas table: polenta can be a very versatile dish and it is typical from Northern Italy. In this recipe I will explain how it is cooked in Friuli Venezia Giulia, or better how in my family used to be cooked. Polenta is made with stone-grounded cornmeal and with a grainy texture. It can be cooked to be creamy and thick, or allowed to set and then sliced. My grandmother takes 2 hours to cook the polenta over the fire – in this version I have used ready to use polenta and I decided to serve it with mushrooms. It is also perfect with meat, fish or poultry.

What you need:

  • pack of ready to make polenta
  • water
  • salt
  • 200 g mushrooms
  • 1 medium onion
  • 1 dl vegetable stock
  • 2 tbsp extra virgin olive oil

(Optional: parsley and cheese).

The ingredients

How to make it:

Cook the polenta following the instructions on the package. This recipe can be done with thick or liquid polenta, it really depends on the taste. When the polenta has reached a thick structure transfer it in a dish and let it cool down. In the meanwhile cook the mushrooms: wash them thouroughly, slice them and cook them in an hot pan with the olive oil and the sliced onion. Add the stock little by little until the mushrooms are tender and have browned.

While the mushrooms are cooking on a low fire you can cut your cooled polenta as desired: as it is Christmas I have shaped it as a snowflake using a cookies cut. Just remember to wash the cutter you are using so the polenta does not stick to it.

Final dish

Serve the mushrooms on the top of the polenta and add some parseley if you like.

Tip: you can also add some Emmenthal or pecorino cheese on top of it.

Pumpkin and mushroom soup

Now that cold weather has arrived nothing is better than a soup. This is also super easy so no excuses like “I don’t know how to cook it” ;)

What you need:

  • 350g pumpkin or buttersquash
  • 250g mushrooms
  • 1 pint of water
  • 1 onion

How to make it:

The ingredients

Heat the oven at 180°C and cook the chopped pumpkin until soft (around 25 mins). Slice the mushroom and boil them in the water together with the onion for 15 mins or until tender. Mix together all the ingredients in a food processor. You can add some fresh parsley and a pinch of salt or some paprika to spice it up. If you like it you can also add a spoon of fresh cream for an even more creamy result. I just added extra virgin olive oil.

Pumpkin and mushroom soup

Homemade tortellini

Tortellini are a traditional pasta from Emilia Romagna, more specific from Emilia. I really recommend a visit to Emilia Romagna, it is a beautiful region with nice people, nice cities and landscapes. In my opinion it is also one the best regions in Italy for pasta. Making your own pasta might seem a bit daunting but I reassure you that the result is very satisfying.

Ingredients for the pasta:

  • 200g 00 flour
  • 2 large free range eggs

How to make it:

Tip the flour in a surface and make a well in the center, break the eggs into the the well and start mixing the flour and the eggs with a fork. Keep beating the eggs and blend the flour into them. You should obtain a crumbly mix and from now on you have to work with your hands.

When the eggs have thickened together with the flour work the mixture to a dough: work it with your hands to a smooth and yellow dough. If possible don’t push the dough against the work surface but try to pull it along the surface. When the dough is ready wrap it with film and set aside for 10 minutes.

You need now to roll out the dough. I suggest to use a pasta machine. I didn’t have it so I had to roll it by hand: that was a good workout for my arms! Run the dough through a pasta roller (or by hand) until you obtain a nice and smooth sheet of pasta.

Cut the sheet into squares, the measure here really depends on the filling. Roughly it would be 3 inches by 3 inches. Place some filling in the middle of each square, if unsure you can use a teaspoon. Dip your finger in some water and run it along the two edges of the square, then fold the square into a triangle, pressing the top together and then working your way along the sides. You need to form a kerchief shape by drawing the bottom two corners of the triangle together. Press to seal and sift with flour so they don’t stick to the working surface.

Tortellini

How to cook tortellini:

Bring a large pot of water to a boil and add a tablespoon or two of salt. Add the tortellini to the water a few at a time with a slotted spoon. Stir occasionally and cook for 5 mins or until they come to the surface of the water.

You can now serve your tortellini: depending on the filling, you can decide the sauce. Below few examples:

  • FILLING: Ricotta and Spinach SAUCE: butter and grated parmesan
  • FILLING: pumpkin SAUCE: black pepper and grated smoked ricotta
  • FILLING: prosciutto SAUCE: mushrooms and parsley ragù.

Tuna and potatoes croquettes: the healthy ones!

This is perfect for your summer lunches/dinners and also if you have kids over: it’s quick, tasty and funny. Usually croquettes are very deep fried but today I want to suggest a lighter option: I hope you enjoy it!

Ingredients:

  • 200g potatoes
  • 240g tuna
  • 50g breadcrumbs
  • extra virgin olive oil
  • 2 egg
  • fresh parsley

How to make it:

Peel and boil the potatoes until tender. Let them cool down and then mash them with a fork until you obtain a nice potato purée. Add the tuna, one egg, the olive oil and the parsley and mix well together. If you prefer you can use a food processor (as I did) so it is faster. Adjust of salt and pepper.

When your mixture is ready for the balls from it; you can try different shapes to add some fun to your dish. Place onto a lined oven tray and set them aside.

Prepare 2 shallows bowls: one with the beaten egg and the other with the other half of the breadcrumbs. Dip each croquette into the egg and then roll it into the breadcrumb: this step will guarantee a golden appearance and a crispy taste!

Cook the croquettes in a pre-heated oven for around 15 minutes or until golden.

Tips to improve your dish:

  1. If you are not on a diet you can deep fry your croquettes
  2. You can use cornflake crumbs or flour to coat the croquettes instead of the breadcrumbs
  3. Make sure you don’t over boil the potatoes
  4. Instead of the parsley you can use fresh mint or use the 2 herbs together
  5. Don’t forget to serve them with some fresh veggies

Gnocchi alla zucca (pumpkin gnocchi)

As this is Jack O’Lantern week I decided to post some recipes with pumpkin as main ingredient. Pumpkin is a very good friend for those who need to keep a special eye on their diet. It’s great for cholesterol and bladder stones. It was also used to treat diabetes 2 because it helps to reduce blood sugars. And last but not least it’s delicious. The first recipe is gnocchi and I really hope you enjoy it.

What you need:

  • 350g potatoes
  • 350 g pumpkin
  • 180 g unbleeched flour
  • 1 egg
  • 1 tsp salt
  • Parmesan or ricotta affumicata
  • black pepper

How to make it:

Preheat oven to 180ºC and in the meanwhile cut the pumpkin into pieces and dispose them on a baking tray. Bake the pumpkin for 25 minutes or until tender. Bring the unpeeled potatoes to the boil and cook them until tender. When all the ingredients are ready let them cool down before you start preparing the gnocchi dough.

With a knife peel the potatoes and mash them together with the pumpkin. You should obtain a lovely and colored purée.

Add the egg, the salt and the flour, beating with a spoon until smooth. Dust a work surface with flour and knead the dough with your hands.

The dough

At this stage you need to divided into 6 pieces and roll each using the palm of your hands to obtain a long rope of about 1 cm thick. Please note that the perfect size of a gnocchi doesn’t exist; I don’t like gnocchi to be too big so I stick to the 1cm rule but you can make it thicker.

Cut each rope into small pieces and if you like you can press each gnocco (this is the Italian singular name!) on the tines of a floured fork.

Pumpkin gnocchi

Bring a saucepan of water to the boil and cook the gnocchi in small batches. This is a VITAL part if you want a good result. If you cook the gnocchi all at the same time they will stick together. When they rise to the surface lift them out with a slotted spoon and drain them well. You need to serve them immediately.

My favourite sauce for gnocchi is very easy. Heat some butter (or margarine, if you like) on a pan and when it’s melted add the gnocchi. Finish with some Parmesan or ricotta affumicata and some black pepper.

BUON APPETITO!

Spaghetti alla carbonara

I’ve been asked to post the recipe for spaghetti alla carbonara. Well, I am very proud that people are following my blog. So, my dear friend, here you have your recipe, I hope you really enjoy it. Before starting I have to clarify few things: the typical ingredients for the original spaghetti alla carbonare are guanciale and pecorino cheese. Guanciale is an Italian cured meat but I could not find it in Dublin. Instead I have used unsmoked bacon, it’s a very good option. Also, if you do not have pecorino cheese you can always use grated parmesan cheese. Last tip before we start: do not put any kind of cream in the pasta. I know some people add white cream or besciamella…DON’T! If you want to cook the real carbonara the below are the ingredients you need, nothing else.

What you need:

  • 200 g spaghetti
  • 150 g guanciale or unsmoked bacon
  • 2 eggs
  • 80 g pecorino
  • extra virgin olive oil
  • black pepper

How to make it:

Bring to the boil some water , add 2 tbs of salt and cook the spaghetti. While the pasta is cooking, dice up the guanciale (or the bacon) and add it to a non sticky pan on a warm heat. Cook the guanciale for few minutes. When the fat is melting remove the pan from the fire and in a large bowl beat the 2 eggs. Add the pecorino to the eggs and keep aside.

Drain the spaghetti, put them to the bowl with the eggs, add the guanciale and toss. IMPORTANT: make sure you don’t put the eggs mixture on the heating otherwise you will have spaghetti with omelette.

Finish your dish with some more cheese, extra virgin olive oil and black pepper and serve immediately.

Basic lasagna recipe

It has been a while since my last post. Ah, such a busy life..:) Anyway, I really hope you will enjoy today’s recipe: LASAGNA! Probably the most famous dish of the Italian tradition.

Lasagna is a very tasty and easy recipe BUT there are few important things to keep in mind. First thing, the quality of the pasta. This is vital for your dish. Many blogs and books advise you to boil the lasagna sheets before assembling the dish, well, do not do it! If you buy a good quality brand of pasta you don’t need to pre cook them as they will cook in the oven with the other ingredients. In my dish I used De Cecco sheets, they are the best. Especially if you make lasagna for the first time, make sure you buy good quality pasta. I don’t recommend you to buy cheap brands – the result is awful.

Second thing: the traditional recipe for lasagna includes 4 main ingredients: pasta, ragù (meat sauce), besciamella and parmesan cheese. All the rest is optional. Of course you can add mozzarella cheese, vegetables, ham, chicken..whatever you want but they are not part of the original recipe.

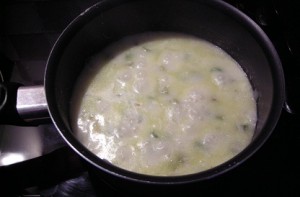
Last but not least: try to make your own hand made besciamella sauce, don’t buy it. It is not difficult, you just need some practice. But I guarantee you that the result will be amazing.

What you need:

  • 500g of lasagna sheets
  • 500 g of ragù
  • 300 ml of besciamella sauce
  • 100 g grated parmesan cheese

How to make it:

Pre heat the oven at 200C°. Pour a thin coating of besciamella sauce into a non-stick tray. Make sure all the tray is covered with a bit of sauce, alternatively you can coat it with butter or olive oil.

Arrange the pasta sheets in order to cover the bottom of the baking dish, then add the ragù and the besciamella sauce. Cover the sauce with another layer of pasta, then again with the meat and the besciamella. At the end you should have 3 layers of pasta.

Cover the top with the ragù and the besciamella sauce left and spread all over the parmesan cheese. This will make sure your lasagna gets a bit crusty on the top.

Cook your dish for 35 minutes at 180°C and serve very warm. It’s perfect with a glass of red wine!

Lasagna

TIP: if you like you can add some parmesan in between the layers of the lasagna, but remember to keep most of it for the top.

Euro Cup 2012

Even if Italy lost against Spain in the final, we still did a great job! Thanks to the Azzuri for all emotions in this tournament! And remember it’s always time for a good Italian pizza!

Pizza

Roasted chicken with potatoes

What you need:

  • chicken drumsticks (6 or 7)
  • extra virgin olive oil
  • salt
  • sage, rosemary and thyme
  • 4 large potatoes

How to make it:

The firs thing to do is marinate the chicken. Mix the salt, the rosemary, the sage and the thyme together and sprinkle the drumsticks with the mixture one by one. Put them in a salad bowl and cover with enough extra virgin olive oil. Allow the chicken to marinate for 2/3 hours.

Chicken marinating

Cut the potatoes in small pieces and boil them for 10 minutes in a sauce pan (remember to add the salt to the boiling water). Pre-heat the oven to 200°C and meanwhile place your chicken in a roasting pan. Add to the tray the potatoes and more olive oil. Remember that the oil will prevent the potatoes from sticking in the baking tray so..be generous! At least 5 tbs of oil are required. Bake in the oven for around 40 minutes and every 10 mins remember to turn the chicken (and the potatoes). If the chicken or the potatoes are too dry add more oil. When the drumsticks are well roasted and cooked (like in the pic) it’s time to enjoy your meal.

Chicken with potatoes

Risotto with asparagus, mint and yoghurt

Well, let’s now celebrate this lovely day with a fresh receipe (finally spring looks to be in Dublin). I actually invented this receipe and at the beginning I was a bit scared of the result! With my big surprise (and also my boyfriend’s one) the risotto was fantastic. I hope you will enjoy it too!

What you need:

  • 1 cup of rice for each person
  • 2 tbsp extra virgin olive oil
  • half chopped onion
  • 100 grams green asparagus
  • 125 ml natural yoghurt
  • 2 or 3 mint leaves
  • 2 cups of warm water
  • 1tsp salt

How to make it:

Heat some extra virgin olive oil in a pan fry and when it’s hot add the onion and the chopped asparagus (rember to remove the woody ends of the asparagus before cooking them). Cook the vegetables for few minutes and then add the rice. Before the risotto starts sticking, add 2 cups of water and cook it for 7/8 minutes or until the water is all evaporated – remember to stirr constantly and gently!

When all the water has evaporated you will need to add the yoghurt and cook the risotto with it. This will make your recipe more creamy and will provide it a really nice, fresh taste. Just note that while cooking the yoghurt will become very liquid (as in the picture); don’t worry, this is normal but don’t forget to stir it: ALWAYS!

Risotto cooking

Keep stirring the rice until all the liquid has gone: this will take around 10 minutes and after this time the dish should be ready (if you are not sure you can always taste your rice and see if you need to cook it more or not!). When no more yogurt is left and your “mantecatura” has been performed the last step is to add the mint leaves, the salt and if you like a pinch of parseley. Serve the risotto immediately and if you like add some Parmesan cheese on the top . In the picture below you can see the dish finished. I know it’s not a great picture but believe me, you will love it!

Risotto

Risotto Giallo/Arancio

Today we are gonna cook the risotto!I love it!It’s a perfect main dish but “posh” enough for a special dinner with your friends, parents, partner. Risotto is a typical dish from the north of Italy, in particular from Lombardia and Piemonte (the areas where italian rice fields are located).

I decided to start with an easy one: Risotto Giallo/ Arancio (Yellow and Orange). It’s Halloween time after all! :o)

The ingredients

You can choose among a big range of risotto’s , depending on your taste and time. To be honest with you the cooking tecnique is almost the same for all the recipes; you just need practice to improve it!

A quick advice before starting- you need to remember the following rules the “Tostatura” and the”Mantecatura”:

  • “Tostatura” should be the first thing to do when cooking risotto. Basically, it is important that your rice is slightly toasted before adding the broth.
  • “Mantecatura” is the last step and it’s necessary if you want a creamy and tasty dish.

Let’s start then!

Ingredients (for 4 ppl):

  • 1 cup of rice for each person (Arborio is probably the best)
  • 1 glass dry white wine
  • 2 chopped carrot
  • 2 chopped yellow pepper
  • half finely chopped onion
  • fine sea salt
  • 500 ml vegetable stock, heated to a simmer (if you don.t have stock you can use hot salty water but the taste won’t be the same)
  • 50 grams of finely chopped parsley
  • 50 grams of grated Parmesan cheese.

Heat 2 tbs of olive oil in a pot over a medium heat. When oil is hot, add the onion and cook until softened. Add the carrot, the pepper and the rice then stir for 1 minute. When your ingredients have softened add the wine and let it evaporate (this is the tostatura!).

Add the first cup of stock and stir constantly until almost all the liquid is absorbed. Add another cup of broth and repeat the previous action. Remember to allow each cup of stock to be absorbed before adding the next. The secret is not to add all the stock at the beginning and leave the risotto cooking on its own. We are not preparing boiled rice, so be patient and follow up your dish!

Cooking

Carry on adding more stock and keep cooking until rice looks tender and creamy (be careful: if the liquid is absorbed too fast you need to reduce the heat).

You can taste your recipe while cooking so you will know when it’s time to remove your pot from the heat.

Add your parmesan and a little slice of butter and ensure they melt well with the risotto (this is the mantecatura). Before serving add the parseley and adjust seasoning if needed.

Risotto

Sorry about the few pics I posted but it’s pretty hard to cook and take pictures at the same time

Pasta salad with vegetables and speck

Today I’m gonna meet some friends for a bbq and everyone is gonna bring something to eat. I’ve decided to prepare a nice pasta salad with vegetables and speck.Ever heard about speck? It’s a gorgeous cured and smoked ham, originally from the Sud – Tirol, an area located between north of Italy and Austria. I love it! You can taste it on small slices with some bread or just add it in many different recipes.

Speck

What you need:

  • 500 grams of pasta (farfalle or penne)
  • 1 aubergine
  • 2 courgettes
  • 300 grams of speck
  • For the dressing:
  • 20 grams of fresh parsley
  • extra virgin olive oil
  • salt and black pepper

How to make it:

Before starting here a small tip: when you prepare a pasta salad never use long pasta (like spaghetti) as it’s very hard to manage (long pasta sticks togheter very easily).

Cook your pasta according to the directions (if you need help, check my previous post) , drain it well and put it into a large bowl. Add to the pasta 3 tbsp of olive oil and let it cool down.

Pasta

Now you need to prepare the vegetables: put some olive oil in a large pan and add the chopped vegetables. Let them cook for about 20 minutes and remember to add half cup of hot water to avoid your vegetables burn.

Cooking the vegetables

Again set aside and let cool.

Vegetables

Cut the Speck as thinly as possible and fry it for 5 minutes, then mix it with the vegetbales. Once all the ingredients are ready, add them to the pasta and gently toss.

Cooking the speck

To prepare the dressing mix the 5 tbsp of olive oil, the parseley and salt and pepper. You can decide to add the dressing immediatly or just before serving – Remember that you need to refrigerate your pasta salad for few hours before serving.

Pasta salad

Pasta – The basics

Pasta is probably the most famous dish of the Italian cuisine. It’s almost impossible not to like it: it has an amazing taste and it’s pretty easy to do. Here you’ll find some tips how to prepare the perfect pasta. As I previously said, it’s an easy recipe but you need to pay attention to all those little things, that usually are not considered.

First of all: the pasta!You can choose among a big variety of pasta: durum wheat (my favourite), whole wheat pasta , egg pasta, brown rice pasta and so on. I’m not gonna talk about different types of pasta, I just want to remember you to read carefully the label when buying it as he quality of the pasta is probably the most important thing if you want a nice result. If you are not “an expert” it is better to prefer a known brand rather then the cheapest you can find.

Secondly, you need a proper pot to avoid pasta clumping up while cooking (in particular if you are cooking long pasta, like spaghetti or tagliatelle). Remember to use plenty of water. A good measure is to use for every 100 grams of pasta about 1.2 liters of water. Once you have the pot ready, put it on the fire and wait until water boils.

Boiling water

Then, you need to add the salt to the water. Adding the salt when water is boiling is a pretty important step. Remember that salt raises the boiling point of water, so if you add it too early it will take more time and energy. I usually put half tablespoon of salt for every 80 grams of pasta and then I taste the water in order to avoid surprises.

Adding salt

Once you have your perfect salty water ready, it’s finally time to add the pasta!While cooking, it’s very important to stir the pasta, especially at the beginning. This is to prevent pasta from sticking together. Always check the cooking time and consider that, most of the times, the one reported on the package is not accurate enough. If you want to get an “al dente” result, keep boiling it for 2 or 3 minutes more than the suggested time. In order to avoid risks, I usally taste pasta 1 minute before the end of the suggested time. If it is firm to the bite and slightly tender then it’s ready (you can test it with a fork).

Checking the pasta

Once pasta is ready, you need to drain it really well. You can leave a little bit of cooking water in the pot and then put it into the pan with your sauce. This step will help you to get a better result when tossing pasta with the sauce. Here there are some mistakes to avoid:

  1. do not add oil while pasta is cooking as it’s not helpful at all. If you don’t want pasta sticking togheter just stir it very often (the first time you cook pasta, try to follow it up as often as you can);
  2. I know some people put cold water into the pot to stop the cooking process. There is not point to do it; when pasta is ready you just need to drain it and then mix it with the sauce you’ve choosen;
  3. do not rinse pasta after you drained it or it won’t mix properly with the sauce; .1do not add oil to the drained pasta. Mix it immediatly with the sauce and only after put some extra virgin olive oil on the top (the only exception where you can put oil straight on the pasta, it’s for “Pasta in bianco” which does not include any sauce. Only extra virgin oil and parmesan);
  4. if you are not gonna serve pasta immediatly let it cool down and then keep it on the fridge.

I hope this little tricks will help you but I suggest you to try and try again. Experience is the best ingredient ever!

Eating pasta :)